Painting the RV walls
I read a lot of blogs and did a lot of research before painting the walls. First off I decided to paint the cabinets before the walls, because I was pretty sure the cabinet finish would hold up to being taped off while I completed the walls. I was not sure if the opposite would be true.
In order to prepare the walls I sanded and then wiped them down with tsp on a rag.
One thing that I found most people recommended was to remove the border and the sticky residue. My experience was not good. The border pulled the wallpaper of underneath and is a complete mess. I wasn’t too worried because I want to put up a back splash anyways, but for now it is a mess.
I used XIM UMA bonder as a primer. This primer is amazing! It goes on thin and dries almost clear. It doesn’t funk up a brush like normal primer would. It is almost like glue.
Dry time was about 3 hours and then I painted the top coat.
The uma worked great over the border and sticky residue(which I didn’t remove because I will be putting sticky tile over it anyways)
My cabinet finish failed in a couple one predictable place, the plastic underside of the cabinet base... my bad, I didn’t sand it very well thinking it was low traffic
The paint I chose was Home Hardware beautitone designer series in a matte finish. I had it tinted in Benjamin Moore china white. This paint is my go to wall paint, almost one coat coverage (I usually do the cutting in twice)
The designer series paint is $59 a gallon and I used one gallon for the main area
The XMI UMA was $69 a gallon and I’m hoping I can even do the bedroom and bathroom with it
I didn’t take any good pictures but will post what I have :)
Happy painting
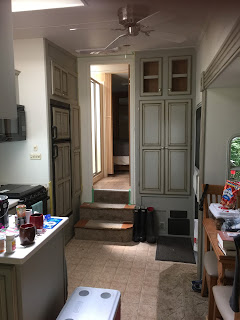
Wall paint all finished, haven’t removed the tape
First night, just the tip out


Comments
Post a Comment